
Gexpress Is a Startup Dedicated to You. Shop With Confidence—Refunds Are Easy Through !

Gardenoutdoor power equipment and accessories
small generator and general small engine accessories
general generator ignition coil
US /en/
USD
Hello, Sign In
Account & Lists
Cart
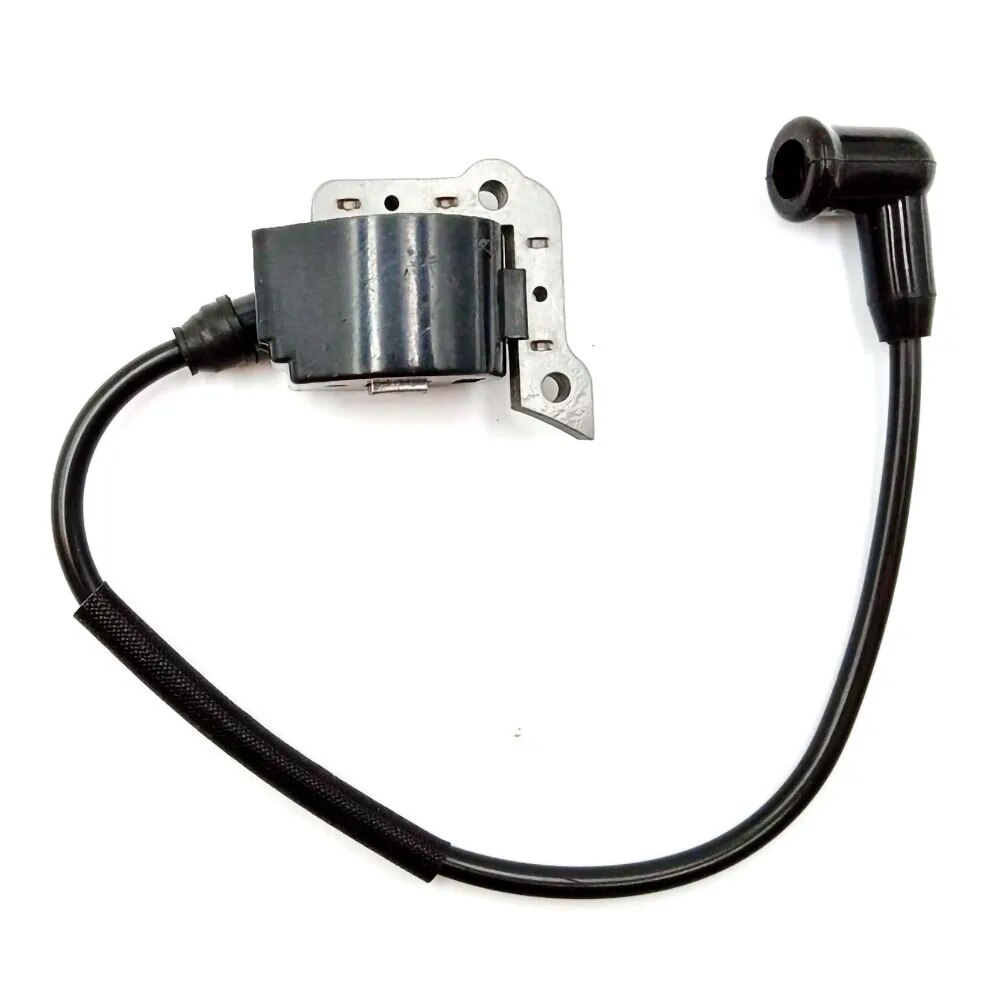
ignition coil for OC models 970 971 980 E 156 162 165 165HD 956 962 compatible replacement parts
140 Sold
USD 20.90USD21.52
94% Limited Time
About This Item
Here are 5 product selling points that meet Amazon’s requirements:
Replacement parts for many models
Suitable for OC Models 970, 971, 980 E, 156, 162, 165, 165HD, 956, 962 and other models of vehicles
Improves engine performance and fuel efficiency
Simple and convenient installation method, no professional knowledge is required to complete
Replaces original parts to ensure reliability and durability
Sold To
United States
USD 5.02
Delivery: 7-15 Business Days
Fast Delivery
Refund If Package Lost
Refund If Items Damaged
Refund If No Delivery in 30 Days
Quantity
1
Installation Instructions

Product Installation Instructions for Ignition Coil Compatible with OC Models 970 971 980 E 156 162 165 165HD 956 962
Tools Needed:
- Socket wrench set
- Screwdriver set (flathead and Phillips)
- Pliers
- Torque wrench (if applicable)
- Wire brush or sandpaper (for cleaning connections)
- Magnetic tray or container (to hold screws and small parts)
- Work gloves (to protect your hands)
- Safety glasses (to protect your eyes)
Installation Steps:
-
Preparation:
- Ensure the vehicle is parked on a flat surface and the engine is cool.
- Disconnect the negative battery terminal to prevent electrical shock.
-
Access the Ignition Coil:
- Depending on your vehicle model, you may need to remove components such as the engine cover or air intake system to gain access to the ignition coil.
- Use a socket wrench to remove any bolts or screws securing these components.
-
Remove the Old Ignition Coil:
- Locate the ignition coil. Disconnect the electrical connector carefully by pulling it straight off.
- Remove any screws or bolts holding the ignition coil in place, using the appropriate socket or screwdriver.
- Once detached, gently pull the old ignition coil out.
-
Clean the Area:
- Use a wire brush or sandpaper to clean the electrical connector and the mounting area to ensure a good connection with the new coil.
-
Install the New Ignition Coil:
- Place the new ignition coil into the mounting location, ensuring it is seated properly.
- Secure the ignition coil with the screws or bolts you previously removed, tightening them to the manufacturer's specifications using a torque wrench (if applicable).
-
Reconnect the Electrical Connector:
- Carefully connect the electrical connector to the new ignition coil, ensuring it snaps into place.
-
Reassemble Any Removed Components:
- If you removed any components (like the engine cover or air intake), reinstall them in the reverse order of removal. Make sure to secure all bolts and screws.
-
Reconnect the Battery:
- Reconnect the negative battery terminal, ensuring a secure connection.
-
Test the Installation:
- Start the engine and listen for any unusual sounds. Check for any warning lights on the dashboard.
Tips:
- Keep all screws and bolts organized in a magnetic tray or container to prevent loss during the installation.
- If you're unsure about any step, consulting the vehicle's service manual can provide additional guidance.
Your new ignition coil is now installed and ready to enhance your vehicle’s engine performance and fuel efficiency. Enjoy the improved reliability and durability that comes with this compatible replacement part!
Description
Ignition Coil Module Compatible with Models 970, 971, 980, 156, 162, 165, 165HD, 956, 962.
Package Included: 1pc Ignition Coil Module.
TAG:
Gardenoutdoor power equipment and accessories
small generator and general small engine accessories
general generator ignition coil
Related Items

