
Gexpress Is a Startup Dedicated to You. Shop With Confidence—Refunds Are Easy Through !

Motorcycle and light motorcycle accessories
US /en/
USD
Hello, Sign In
Account & Lists
Cart
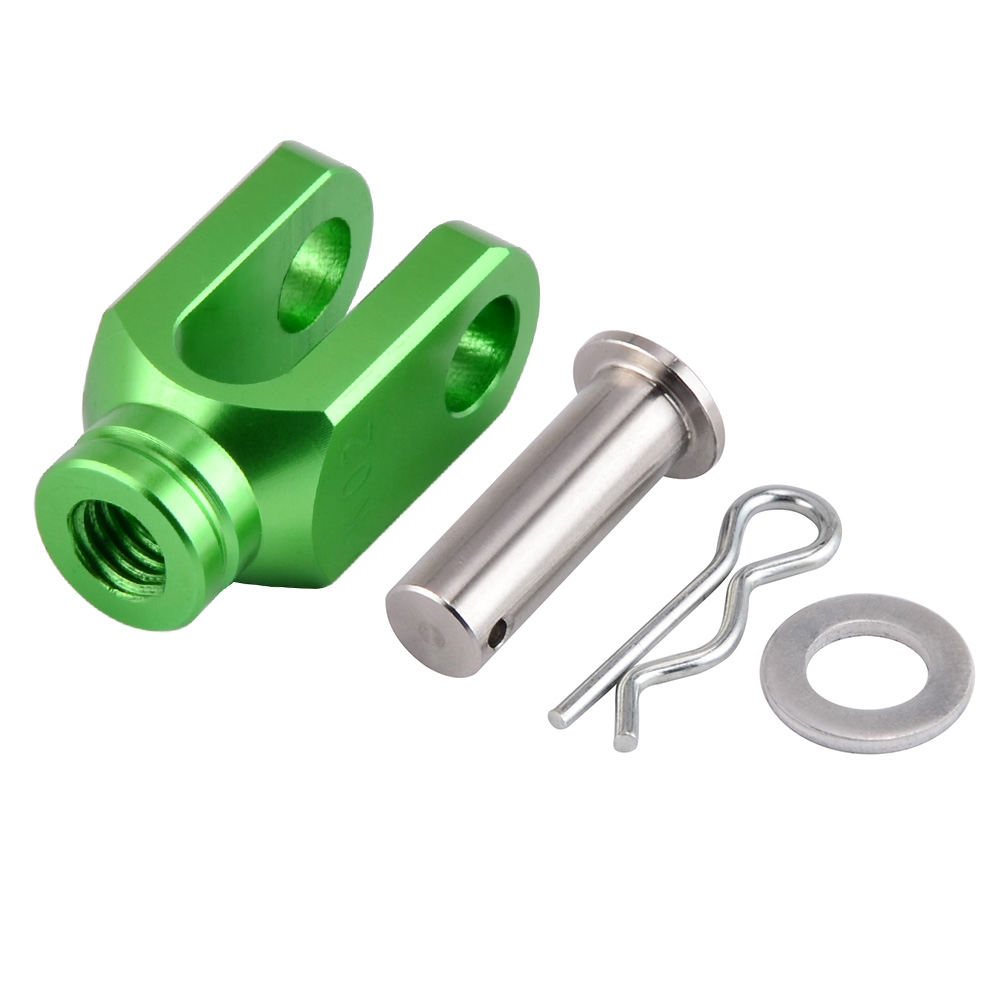
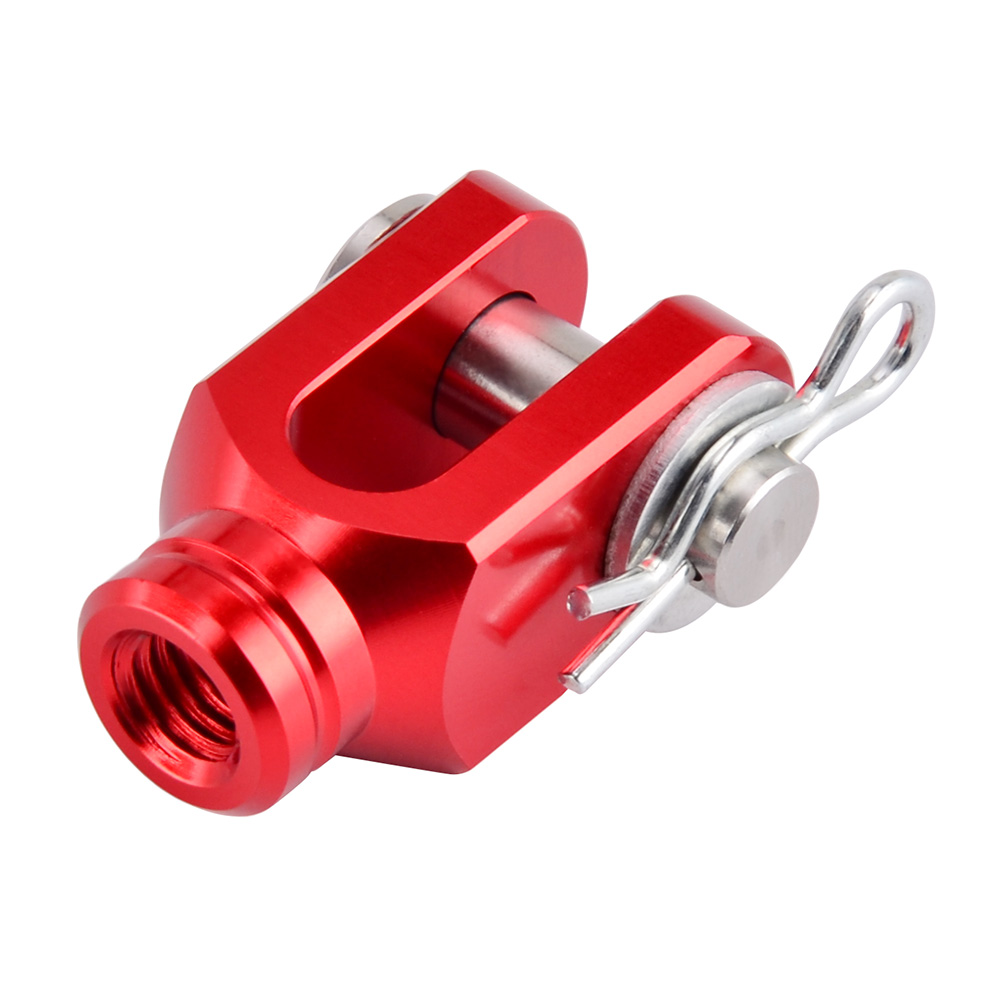
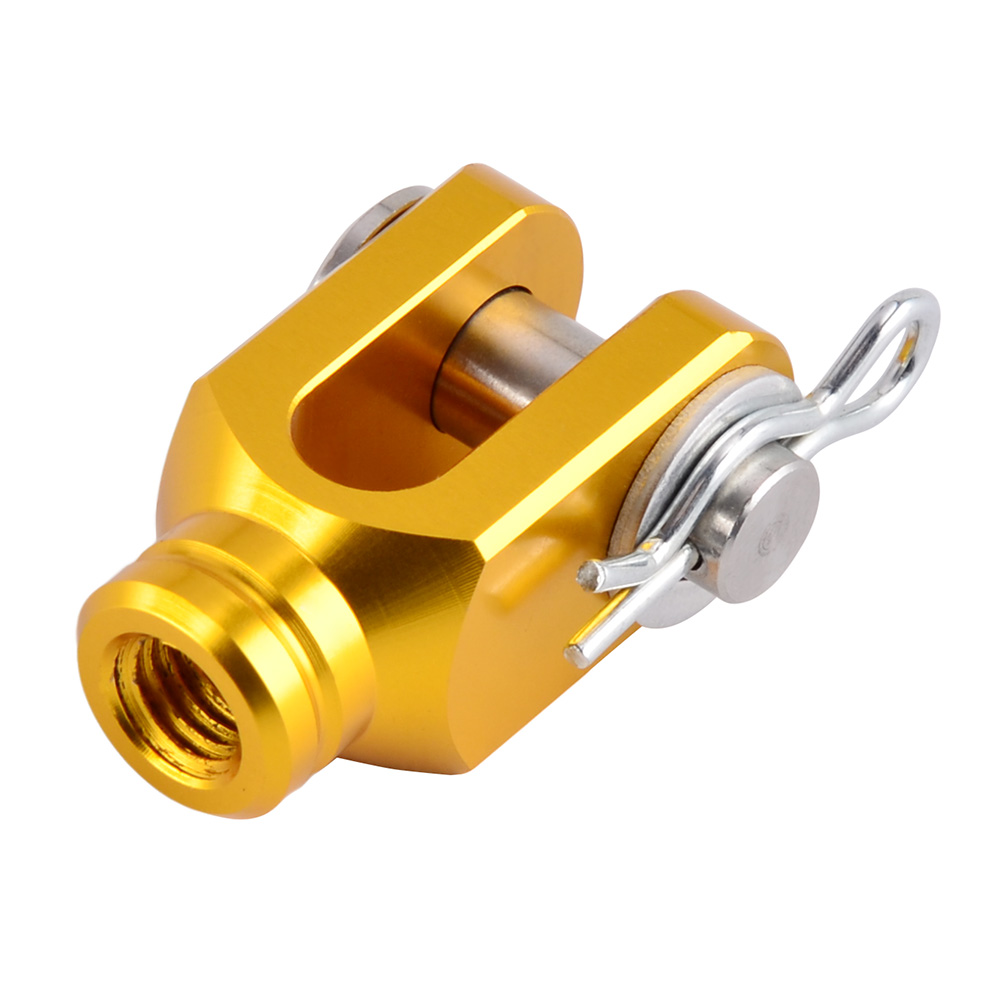
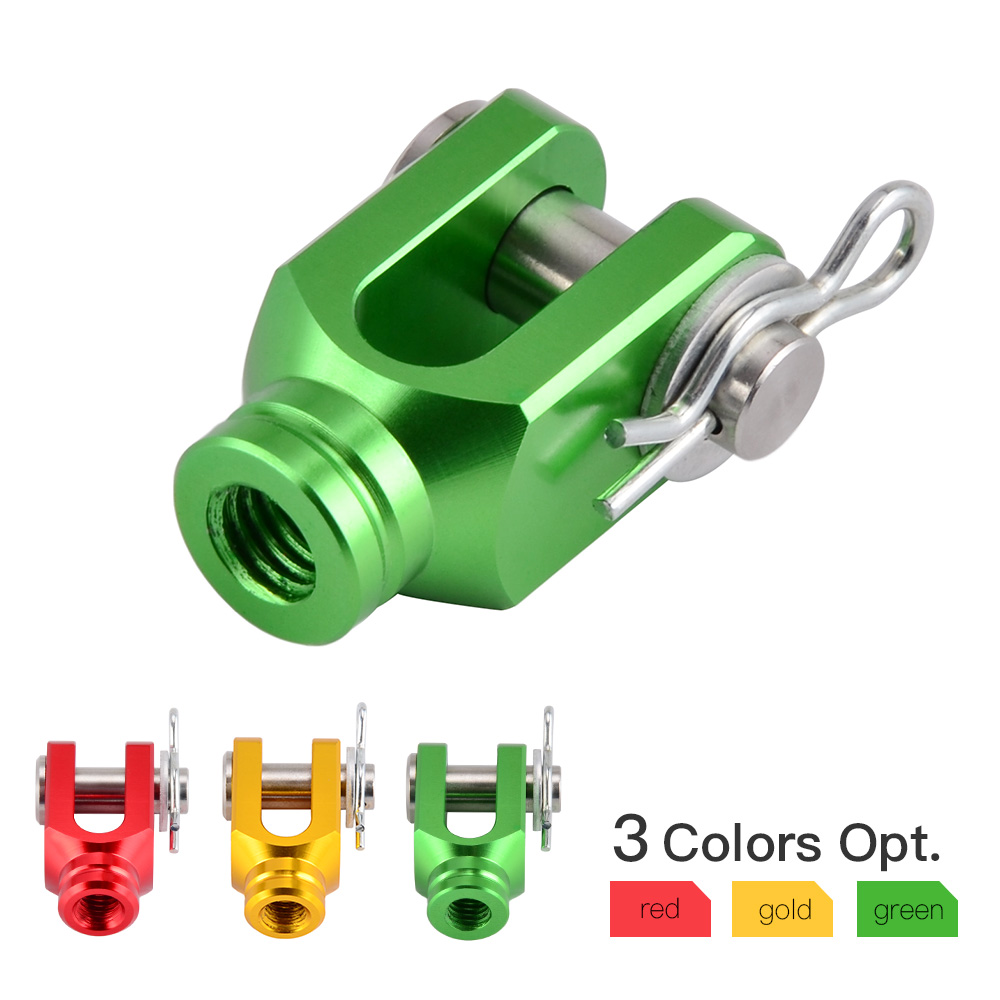
rear brake clevis for compatibility with various dirt bike models including KX 80 85 100 125 250 KL X 125 150bf 150S 250
130 Sold
USD 4.79USD4.93
91% Limited Time
About This Item
Wide compatibility, this rear brake caliper connector is suitable for a variety of dirt motorcycles, including KX 80, 85, 100, 125, 250 and KLX 125, 150BF, 150S, 250 and other models
Simple design, easy to install quickly, Users can complete the replacement without complicated tools
Made of sturdy and durable materials to ensure stability and safety in various riding conditions
Comply with original factory specifications to ensure a perfect fit with the motorcycle's rear braking system
Improve the riding experience, help you stably control the speed on different terrains, and improve driving confidence.
Sold To
United States
USD 5.01
Delivery: 7-15 Business Days
Fast Delivery
Refund If Package Lost
Refund If Items Damaged
Refund If No Delivery in 30 Days
Quantity
1
Installation Instructions

Installation Instructions for Rear Brake Clevis Compatibility with Various Dirt Bike Models
Compatible Models: KX 80, 85, 100, 125, 250 and KLX 125, 150BF, 150S, 250
Tools Required:
- Wrench Set: To tighten and loosen bolts/nuts.
- Screwdriver: A flathead or Phillips screwdriver may be necessary for securing certain components.
- Pliers: To hold or grip parts while attaching.
- Torque Wrench: To ensure that bolts are tightened to the manufacturer’s specifications.
- Clean Cloth: For wiping any dirt or debris off parts before installation.
- Grease or Lubricant: To lubricate moving parts for smoother operation.
Installation Steps:
-
Preparation:
- Make sure the dirt bike is parked on a flat surface and is secure (consider using a bike stand).
- Gather all necessary tools and the new rear brake clevis.
-
Remove the Old Clevis:
- Locate the rear brake clevis. Use the wrench to remove any bolts or nuts holding it in place.
- Carefully detach the old clevis from the brake system; ensure you keep any hardware for reuse if applicable.
-
Install the New Clevis:
- Align the new rear brake clevis with the brake assembly as per manufacturer specifications.
- Secure the clevis using the bolts/nuts. Make sure to hand-tighten initially before using the wrench.
-
Final Tightening:
- Using the torque wrench, tighten the bolts/nuts to the manufacturer’s recommended torque values for safety.
- If applicable, ensure that any pivot points are lubricated for optimal performance.
-
Check Alignment and Movement:
- Ensure that the rear brake operates smoothly and that there are no obstructions.
- Verify that the clevis is properly aligned within the brake system.
-
Test Ride:
- Before heading out on a lengthy ride, conduct a short test ride to check the functionality of the rear brake system.
- Ensure that the brake responds effectively and confidently.
By following these steps, you can successfully install the new rear brake clevis and enhance your riding experience with improved control and safety across various terrains.
Description
Clevis Body Material: A7009-T6 Aluminum
Color Available: Anodized Green, Gold, Red
Includes a specially designed stainless steel pin
Lightweight with strength and durability
Provides improved brake pedal feel
CNC-machined Billet Aluminum
Anodized surface finish
Easy to install
Package Included:
1 x Rear Brake Clevis
TAG:
Motorcycle and light motorcycle accessories
Related Items

