
Gexpress Is a Startup Dedicated to You. Shop With Confidence—Refunds Are Easy Through !

Auto parts
US /en/
USD
Hello, Sign In
Account & Lists
Cart
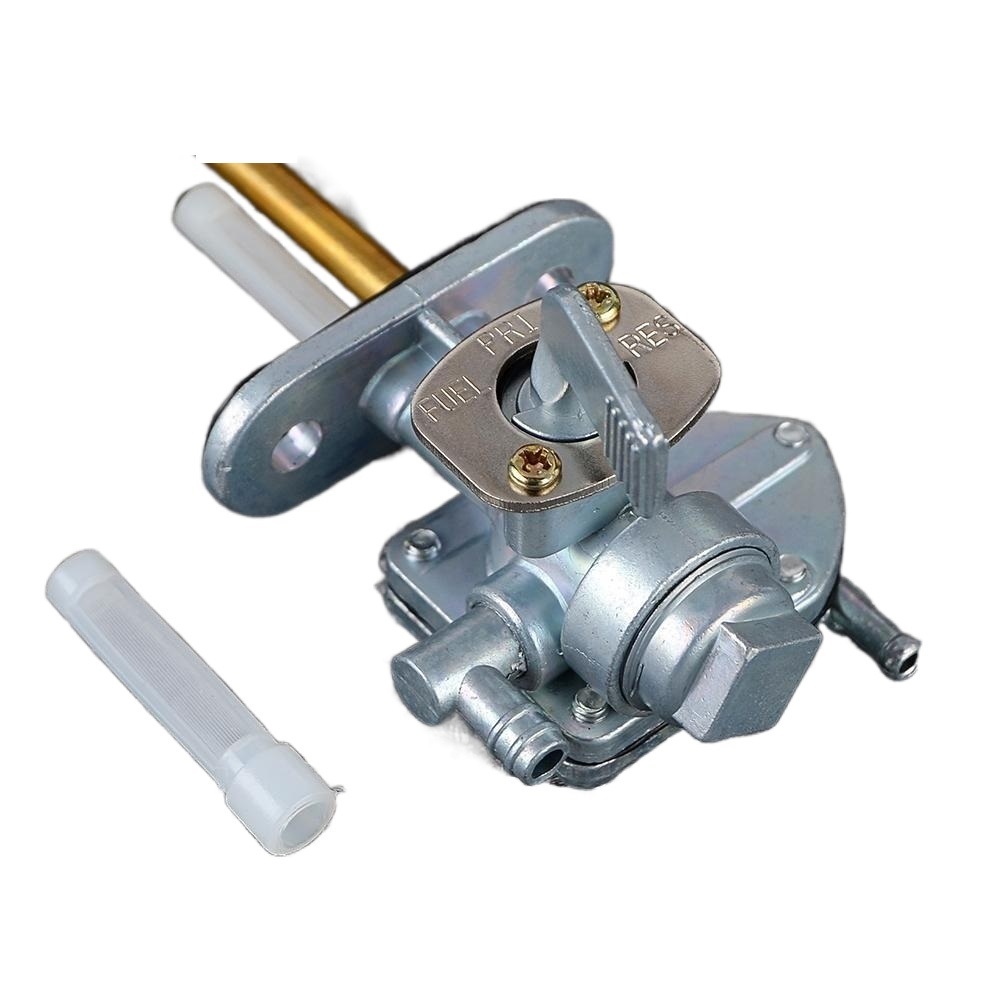
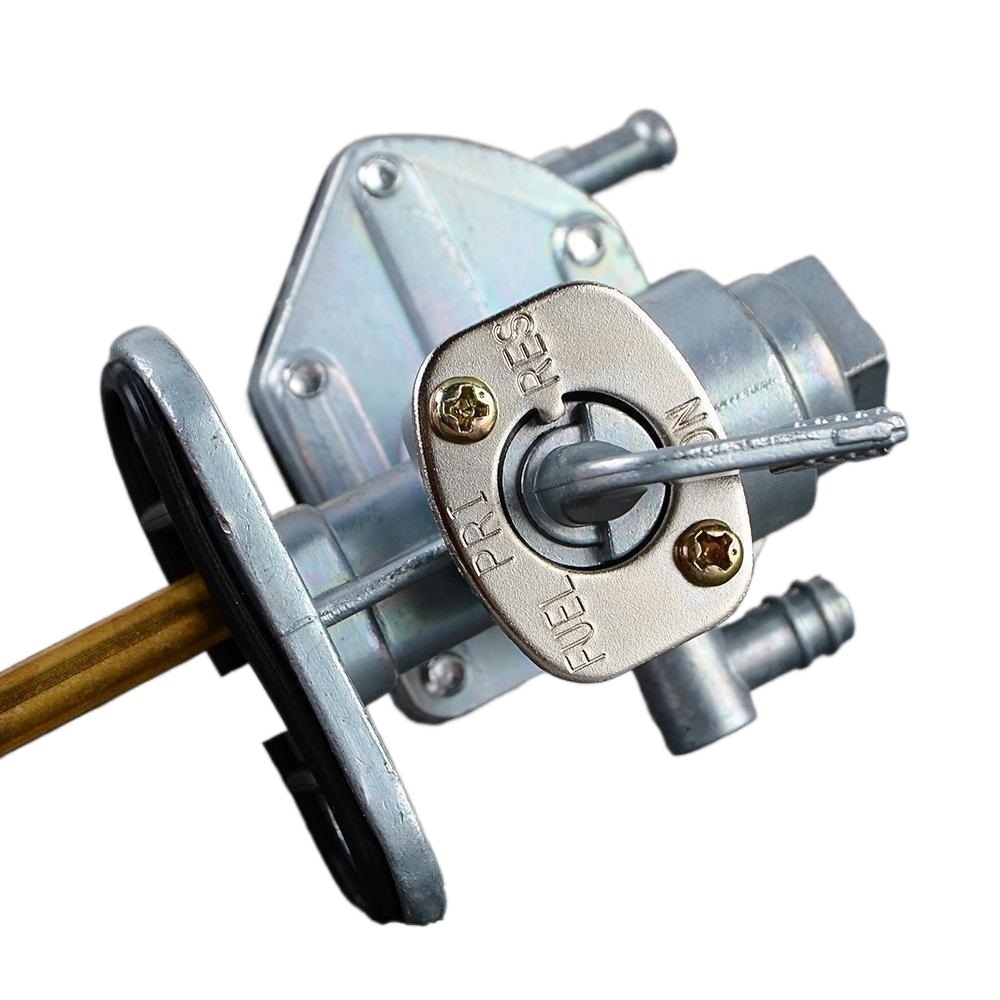
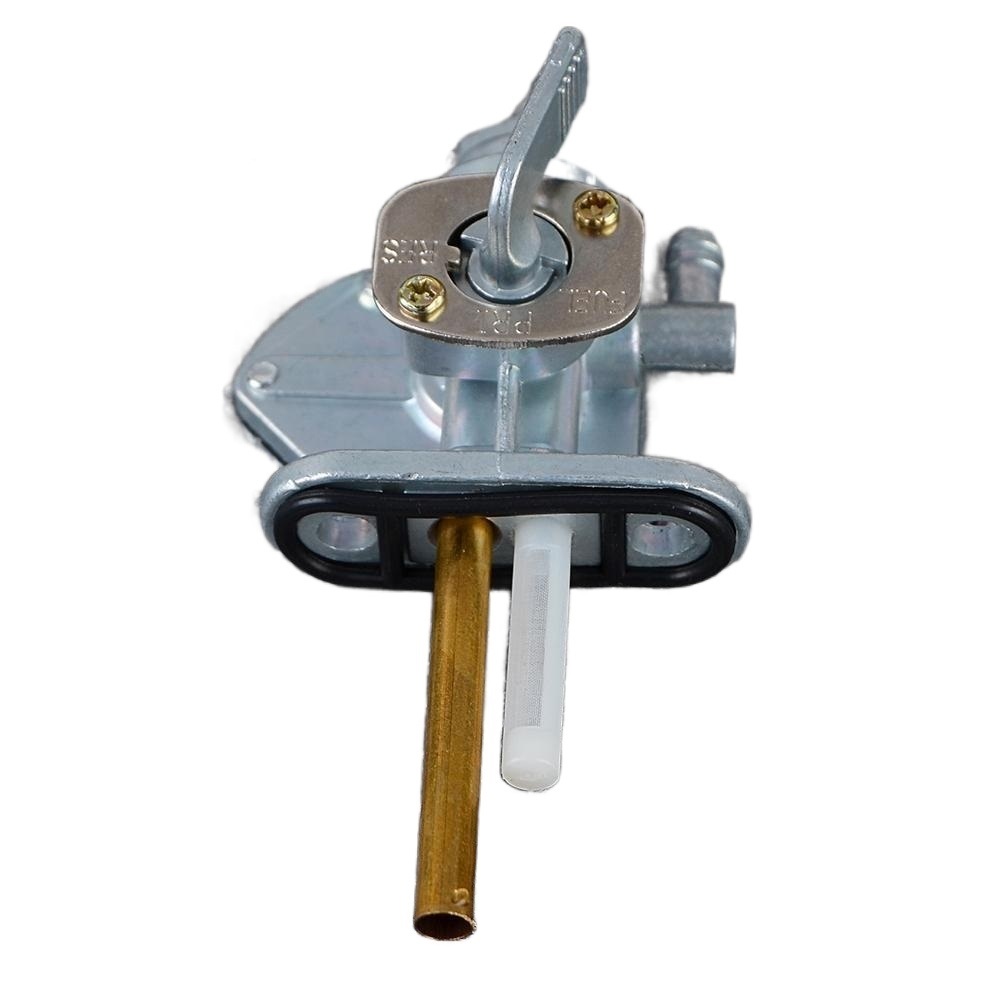
gas tank fuel petcock valve switch tap for 750 XV750 1981-1997 550 650 750R compatible with multiple models
184 Sold
USD 9.68USD9.97
92% Limited Time
About This Item
Strong compatibility: This fuel tank valve is suitable for multiple motorcycle models, including 750 XV750 (1981-1997), 550, 650 and 750R, meeting the needs of various models.
Easy to install: The design is easy to install, allowing you to quickly replace it without complicated tools, saving time and energy.
Durable materials: Made of high-quality materials to ensure long-term stable use and adapt to various driving conditions.
Diverse functions: not only used for fuel tank switching, but also can effectively prevent leakage and ensure driving safety.
Performance improvement: Improve fuel supply, increase engine efficiency, and optimize the overall riding experience.
Sold To
United States
USD 8.02
Delivery: 7-15 Business Days
Fast Delivery
Refund If Package Lost
Refund If Items Damaged
Refund If No Delivery in 30 Days
Quantity
1
Installation Instructions
Product Installation Instructions for Gas Tank Fuel Petcock Valve Switch Tap
Compatible Models:
- 750 XV750 (1981-1997)
- 550
- 650
- 750R
Required Tools:
- Phillips screwdriver
- Flathead screwdriver
- Adjustable wrench
- Pliers
- Towels or rags (for cleanup)
- Fuel line clamps (optional but recommended)
Installation Steps:
-
Preparation:
- Ensure that the motorcycle is parked on a flat surface and is stable.
- Turn off the fuel petcock and disconnect the battery to avoid any electrical issues.
-
Drain Fuel:
- Place towels or rags under the fuel petcock area to catch any spills.
- Carefully drain the fuel from the tank by opening the petcock valve. Allow all fuel to flow out into an appropriate container.
-
Remove Old Petcock:
- Use a Phillips screwdriver to remove any screws securing the old petcock.
- If there are fuel lines attached, gently detach them using pliers, and be cautious as residual fuel may remain.
-
Install New Petcock:
- Position the new gas tank fuel petcock valve switch tap in place.
- Secure it with screws, ensuring it is tightly fastened but not over-tightened to avoid damage.
-
Reattach Fuel Lines:
- Reconnect the fuel lines to the new petcock. If necessary, use fuel line clamps to secure them.
- Ensure that there are no kinks in the fuel lines for proper fuel flow.
-
Check for Leaks:
- Before re-connecting the battery, turn the petcock to the 'ON' position and allow a small amount of fuel to flow into the lines.
- Inspect the connections for any leaks. If any leaks are detected, tighten connections accordingly.
-
Reconnect Battery:
- Once all connections are secure and there are no leaks, reconnect the motorcycle battery.
-
Final Inspection:
- Start the motorcycle and let it idle for a few minutes.
- Monitor the new petcock for proper operation and check for any fuel leaks.
Conclusion:
With these simple steps, you can efficiently install the Gas Tank Fuel Petcock Valve Switch Tap and enhance your motorcycle's performance. Enjoy a safer and more efficient ride!
Description
Material: Aluminum Alloy + Rubber
Type: Fuel Petcock
Package Included: 1X Fuel Petcock
Positions Switch: ON | OFF | RESERVE
ON: Enables normal fill-ups.
OFF: Shuts off gas flow completely when not in use.
RESERVE: Accesses the lower portion of the gas tank when fuel level is low.
TAG:
Auto parts
Related Items

