
Gexpress Is a Startup Dedicated to You. Shop With Confidence—Refunds Are Easy Through !

Motorcycle and light motorcycle accessories
US /en/
USD
Hello, Sign In
Account & Lists
Cart
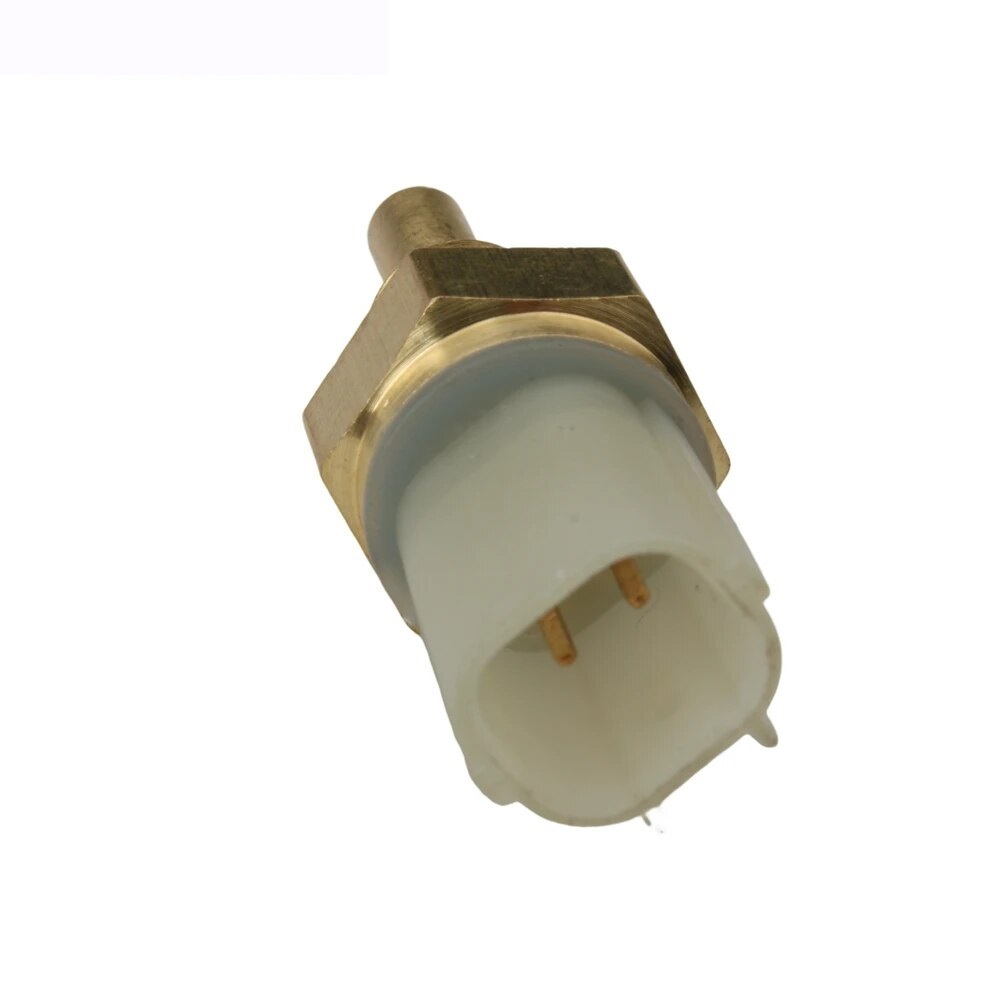
Thermo Unit Sensor Compatible with Multiple Motorcycle Models EX5 Wave 110 Beat 110 MSX125 Grom125 Biz125 CBF125 NX150 XRE300 Model 37750KPH701 Available in Amazon Store
69 Sold
USD 6.99USD7.19
95% Limited Time
About This Item
Multiple compatibility: This thermal sensor is suitable for a variety of motorcycle models, including EX5, Wave 110, Beat 110, etc., to meet different riding needs.
Reliable Performance: Designed to provide accurate temperature readings to help riders monitor the working status of their motorcycle and avoid overheating issues.
Easy installation: The user-friendly design makes the installation process simple, suitable for most users to operate by themselves, saving maintenance time and costs.
Durable materials: Made of high-quality materials to ensure long-term use and improve the stability of motorcycle performance.
Flexible application: Suitable for a variety of motorcycle types, satisfying riding enthusiasts’ concerns about vehicle condition and improving the riding experience.
Sold To
United States
USD 8.02
Delivery: 7-15 Business Days
Fast Delivery
Refund If Package Lost
Refund If Items Damaged
Refund If No Delivery in 30 Days
Quantity
1
Installation Instructions
Product Installation Guide for Thermo Unit Sensor
Compatible Models: EX5, Wave 110, Beat 110, MSX125, Grom125, Biz125, CBF125, NX150, XRE300
Tools Required:
-
Screwdriver Set:
- A flathead screwdriver
- A Phillips screwdriver
-
Wrench Set:
- A socket wrench (typically 8mm or 10mm, depending on the model)
-
Pliers:
- Needle-nose pliers for better grip in tight spaces
-
Torque Wrench:
- To ensure bolts are tightened to manufacturer specifications
-
Rags or Towels:
- For cleaning up any spills and keeping the working area tidy
-
Safety Gear:
- Gloves to protect your hands
- Safety goggles to shield your eyes
Installation Steps:
-
Preparation:
- Turn off the motorcycle and ensure the engine is cool to avoid burns.
- Disconnect the battery negative terminal to ensure safety during installation.
-
Locate the Existing Sensor:
- Identify the location of the old thermosensor, typically near the engine or on the coolant pipe.
-
Remove the Old Sensor:
- Use the appropriate screwdriver or wrench to carefully unscrew the sensor from its position.
- Allow any residual fluid to drain before fully removing it.
-
Install the New Thermo Unit Sensor:
- Position the new sensor in the same location as the old one.
- Hand-tighten it initially to avoid cross-threading.
- Use the wrench to secure it in place, but make sure not to overtighten.
-
Reconnect the Battery:
- Reconnect the negative terminal of the battery securely.
-
Test the Installation:
- Start the motorcycle and allow it to run for a few minutes.
- Check the display for accurate temperature readings and ensure there are no leaks.
-
Final Check:
- Inspect the installation area to ensure everything is tightened and there are no loose wires or components.
By following these steps and using the required tools, you can successfully install the Thermo Unit Sensor and enhance your motorcycle’s performance and reliability. Enjoy your ride!
Description
This thermo unit sensor is compatible with various motorcycle models including EX5, Wave 110, Beat 110, MSX125, Grom125, Biz125, CBF125, NX150, and XRE300. Please ensure to check the pictures, models, and part number for compatibility before ordering.
TAG:
Motorcycle and light motorcycle accessories
Related Items

