
Gexpress Is a Startup Dedicated to You. Shop With Confidence—Refunds Are Easy Through !


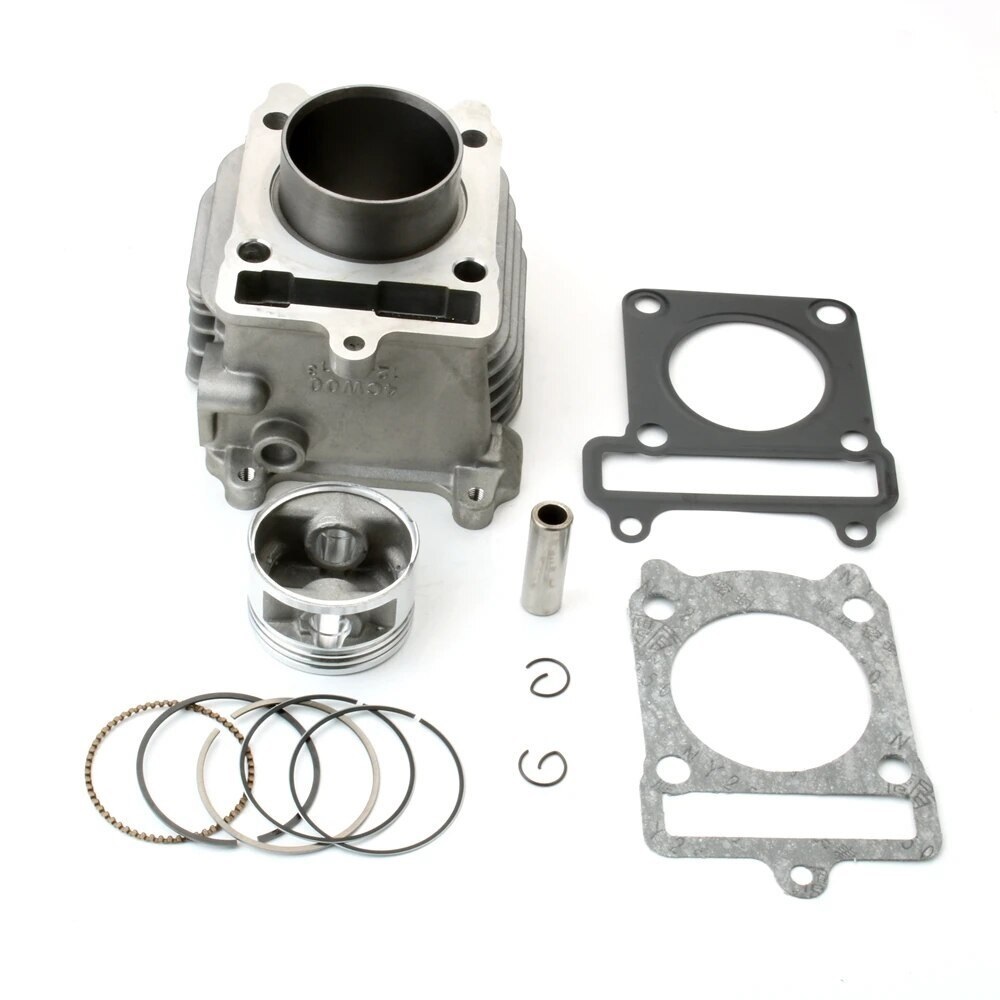
Installation Instructions for 51.5mm Cylinder Kit and Piston for 125cc 4T 2V Engine
Tools Required:
- Socket Set - For removing bolts and nuts from the engine.
- Torque Wrench - To ensure the proper torque specifications are met when reassembling.
- Piston Ring Compressor - To install the piston rings onto the piston.
- Screwdriver Set - For various screws on the engine cover and components.
- Pliers - Useful for removing and installing circlips.
- Gasket Scraper - To remove old gaskets and ensure a clean surface for the new gasket.
- Clean Cloths or Rags - For cleaning surfaces and removing debris.
- Engine Oil - For lubricating the new piston and rings during installation.
- Work Gloves - To protect your hands while working on the engine.
- Safety Goggles - To protect your eyes from debris.
Installation Steps:
-
Preparation: Ensure your workspace is clean and organized. Gather all necessary tools and components.
-
Drain Engine Oil: Before starting, drain the existing engine oil to avoid spills during the removal process.
-
Remove the Engine Cover: Use the socket set and screwdriver to unfasten and carefully remove the engine cover.
-
Remove Old Cylinder and Piston: Detach any components obstructing the cylinder and piston. Use the socket set to unbolt the cylinder and gently lift it off. Remove the old piston, using pliers to take out the circlips.
-
Clean Surfaces: Use the gasket scraper to carefully clean the engine block and ensure there is no residue left from the old gasket.
-
Install New Piston: Apply a thin layer of engine oil to the new piston and rings. Use the piston ring compressor to compress the rings and insert the piston into the cylinder.
-
Attach New Cylinder: Carefully place the new cylinder over the piston and align it. Bolt it down using the torque wrench according to the manufacturer's specifications.
-
Reassemble Engine Components: Reattach any components you previously removed, ensuring all bolts and screws are tightened properly.
-
Install New Gasket: Place the new gasket onto the cylinder if required and position the engine cover back in place.
-
Refill Engine Oil: Add fresh engine oil to the engine before starting.
-
Final Checks: Double-check all connections and bolts before starting the engine.
-
Start Engine: Turn on the engine to ensure everything operates smoothly.
Note: It’s important to follow all safety procedures and the manufacturer’s guidelines during installation to ensure optimal performance and safety.

